
pfSense is one of the most versatile firewall systems available out there in the market. It uses BSD as its base operating system. pfSense is based on moonwall(another firewall distribution). System admin can customize it however they like, pfSense has large number of customization options. pfsense allows you to enable a captive portal on your network for authentication and authorization. Captive portal adds just another layer of abstraction and security to your network so that you could prevent any unauthorized use of your network. By setting up captive portal you can monitor everything on a user level.
pfSense captive portal module has tons of customization options but one thing that it does not have is the ability to have a user logout page. pfSense surely offers a popup logout window but popups are blocked by most modern day browsers. So there’s no way for your users to logout from your network. In this article we have explained how you can set up your own logout page for your pfSense distribution.
Logout page for pfSense captive portal
You can follow this very simple tutorial and set up a logout page for pfSense captive portal. We made some modifications to the “/usr/local/captiveportal/index.php” file. This file contains the logic code for captive portal. So the idea is to replace the index.php with our modified version of index.php file. Follow this very simple and short guide and setup your pfSense captive portal logout page.
First you need to have access to your pfSense machine CLI. Either you can type commands directly into the pfsense console or you can ssh your pfsense firewall.
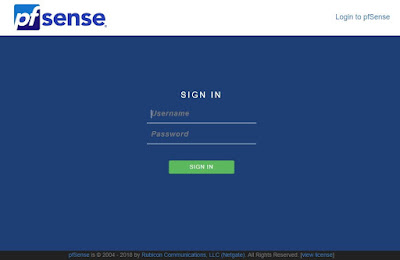
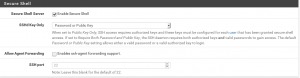
To activate SSH access on pfSense, log into your pfSense Web Configurator, then go to Settings>Advanced and check “Enable Secure Shell” check box and save the settings as shown below.
Now make SSH connection to the firewall or type things directly into the pfSense CLI.
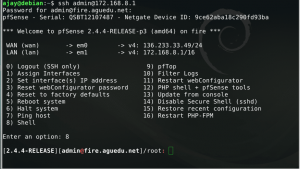
On pfSense console, press 8 and you will get the shell access with root user. Now change the working directory to /usr/local/captiveportal
#cd /usr/local/captiveportal
Type “ls -l” and you will see all the available files in this directory.

Now rename the index.php to index.php.backup. This way you will have a backup of your original index.php file. Thus, if anything goes wrong you can restore things back to the normal.
#mv index.php index.php.backup
Now download the tarball using curl.
#curl https://olinux.net/pf/pfsense-logout.tar --output pfsense.tar
After successfully downloading the tar file extract it.
#tar xvf pfsense.tar
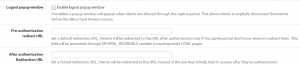
Now exit the console and activate the captive portal from the Web Configurator settings. Go to Services>Captive Portal and enable the captive portal. In order for this to work you are required to leave the “After authentication Redirection URL” field blank. You also need to leave the “Logout popup window” option unchecked in captive portal settings as shown below. Hit save and login through captive portal. Upon successful login user will be redirected to the logout page.
Try this and leave comments below if you face any difficulty, we’ll try to help you.
Post a Comment